Solving unconfirmed Bitcoin transactions in Electrum
Bitcoin is becoming more and more popular. The amount of transactions per day is increasing and is at an all times high:

While this is good news, it also has its downsides. Because the size of each mined block is fixed to 1MB, the amount of transactions per block is limited. There is a lot of debate whether this should be changed. The consequence in the current system is that not all submitted transactions can be processed quickly. The time until a transaction is confirmed can therefore become rather long. Fortunately, the bitcoin network is based on market principles. The invisible hand takes care of this issue: By adding higher processing fees to your transaction you can make sure that it receives higher priority. Miners will make sure to include it in the next block, because in the end it’s all about the money!
Sometimes, however, the fee you’ve assigned is too low and your transaction will take very long. It is even possible that it will never get confirmed. Recently, I experienced this case myself. My transaction was stuck for more than 24 hours because my wallet software, Electrum, was outdated. It proposed a way too low fee for the transaction and since I never had to change the default in the past, I just submitted it. After a few hours, I lost my hope that the issue will resolve itself. So I started reading up on solutions and came along quite a few:
- Manually removing the transaction from the wallet and double-spending it. This is inconvenient, because you have to stop broadcasting your transaction and then wait until the nodes forget about it. This can take an arbitrarily amount of time, i.e. up to several days. Otherwise, your new transaction will be declined as “double-spending”.
- Using the ViaBTC accelerator. In general this works, but they accept only 100 transactions per hour. Your best chance is to submit your transaction at the beginning of an hour. Also, even when your submission goes through you’ll have to wait until their pool mines a block. This can take several hours.
- Use the replace by fee option. Not all clients support this, but the current Electrum version does. Basically, you can flag your transaction as “replaceable by fee” before submission. If it takes too long to confirm, you can resend it using a higher fee and it wont be rejected as a double-spend. In hindsight, this a a great solution…
- Child pays for parent. “[…] as the name implies, spending an unconfirmed transaction will cause miners to consider confirming the parent transaction in order to get the fees from the child transaction included in the same block.”
For me, only the last method was practicable and this will often be the case. I found some pretty decent descriptions of the method here and here. However, applying the method in the practice with Electrum was somewhat tricky. Therefore, I offer a more detailed step by step how-to here.
Child pays for parent … what?
The basic idea is to create a new transaction which uses part of your unconfirmed transaction as an input. This transaction should have an elevated fee. For miners to confirm it they will also have to include the previous, unconfirmed transaction into the block. If the fee of the second transaction is high enough to compensate for both transactions, miners will willingly do this.
If you are on the receiving side of an unconfirmed transaction, it’s trivial to apply the method: Just spend some of the received coins (or send to yourself) with an extra juicy fee. Problem solved. (for determining an appropriate fee read on) But even if you are the sender, you can most likely use the method. This is because most of the time some amount of the transaction gets back to you as “change”. You can see this by looking at transaction details and checking the outputs. So, let’s see how to speed things up as the sender using the Electrum wallet:
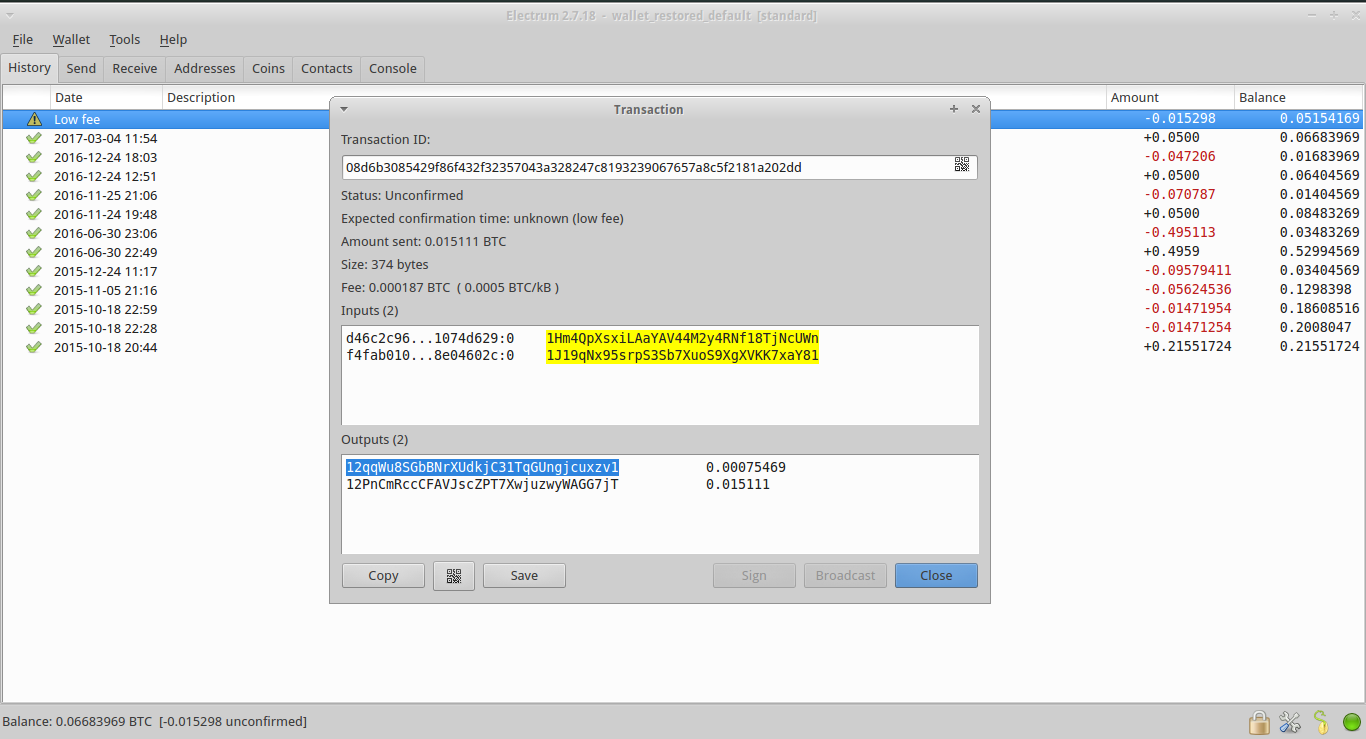
- First, find out if an output of the transaction went to yourself (the change). Go to the history tab. Select your transaction and open up the details. Transactions to yourself that acted as change will be marked yellow. Write down the hash. In this case
12qqWu8SGbBNrXUdkjC31TqGUngjcuxzv1(it is blue and not yellow here, because I’ve already selected it for copy&paste)
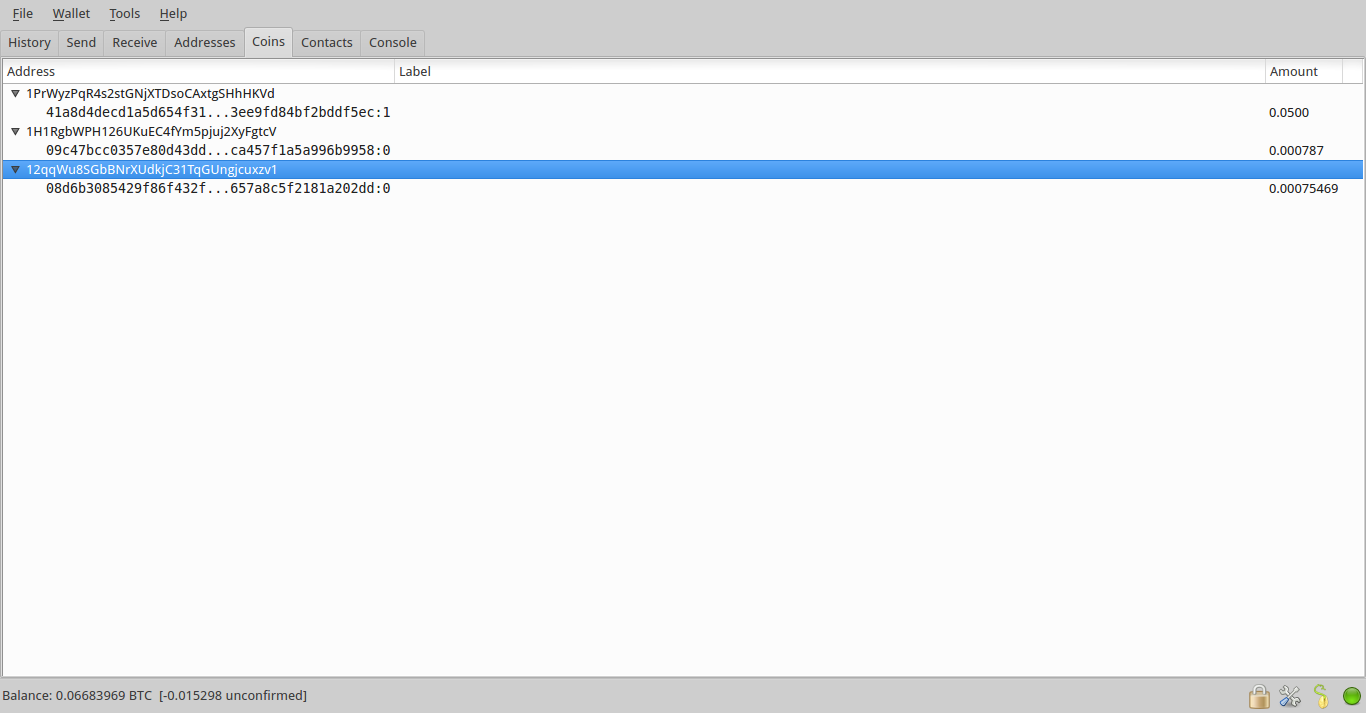
- Now, go to the “Coins” tab, select the corresponding hash, right-click and select “Spend from Address”
-
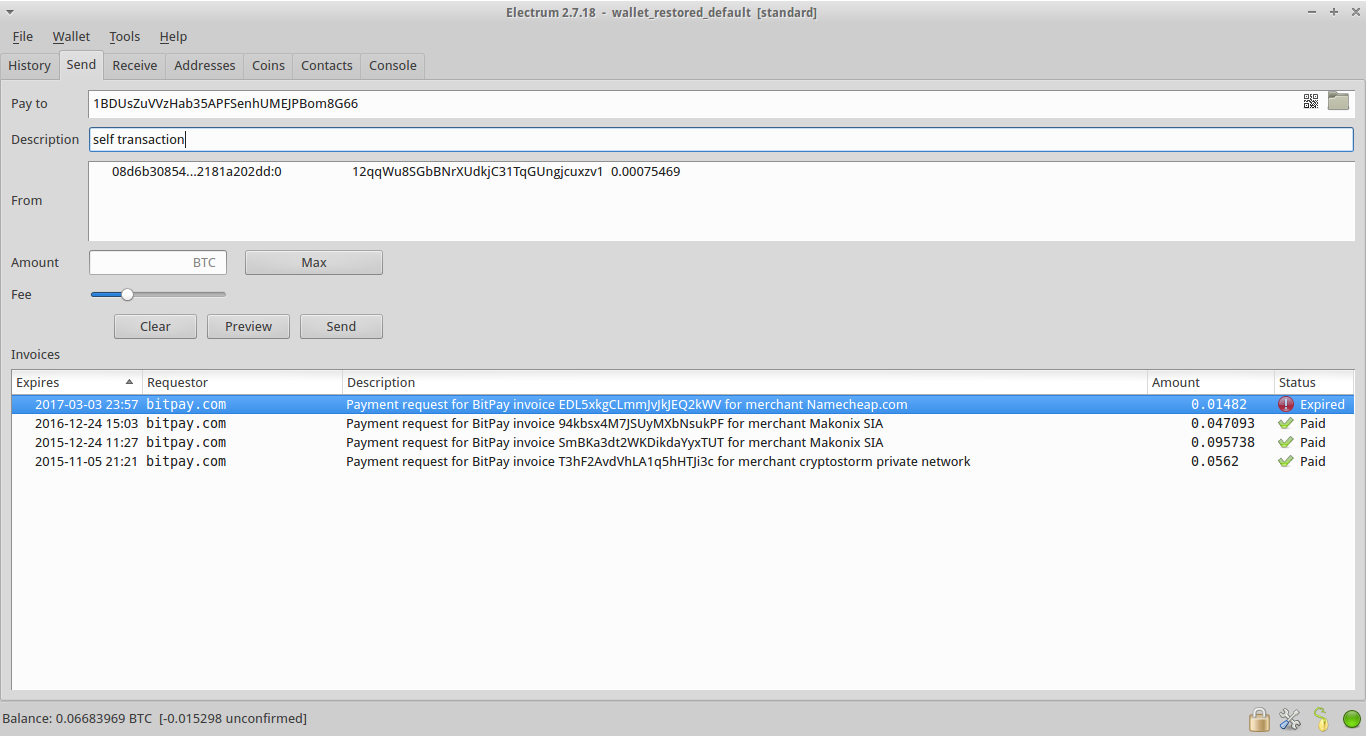
This will take you to the “Send” tab where the “From” field already includes the correct input. Notice that usually Electrum determines the inputs automatically and hides the “From” field.
-
If the input contains sufficient coins for covering the fees of the transaction as described below, you’re good to go. Otherwise, skip the next step and come back to it after reading on.
-
Go on and enter one of your receiving addresses in the “Pay to” field. Additionally, make sure to add an appropriate fee for the transaction. This is the crucial part! To determine the fee go to https://bitcoinfees.21.co and look up their dynamic recommendation. Now, find out the combined size of both your transaction. For your unconfirmed one, go back to the “history” tab and check the “size” field in the details. For the current one, click the “Preview” button. Add those numbers and multiply by the recommended fee per byte. This gives you a good idea of the total fee you should now enter in Electrum. If there is no field to enter a fee manually but only a slider, make sure to check the “Edit fees manually” box in the preferences. Sign and broadcast your transaction.
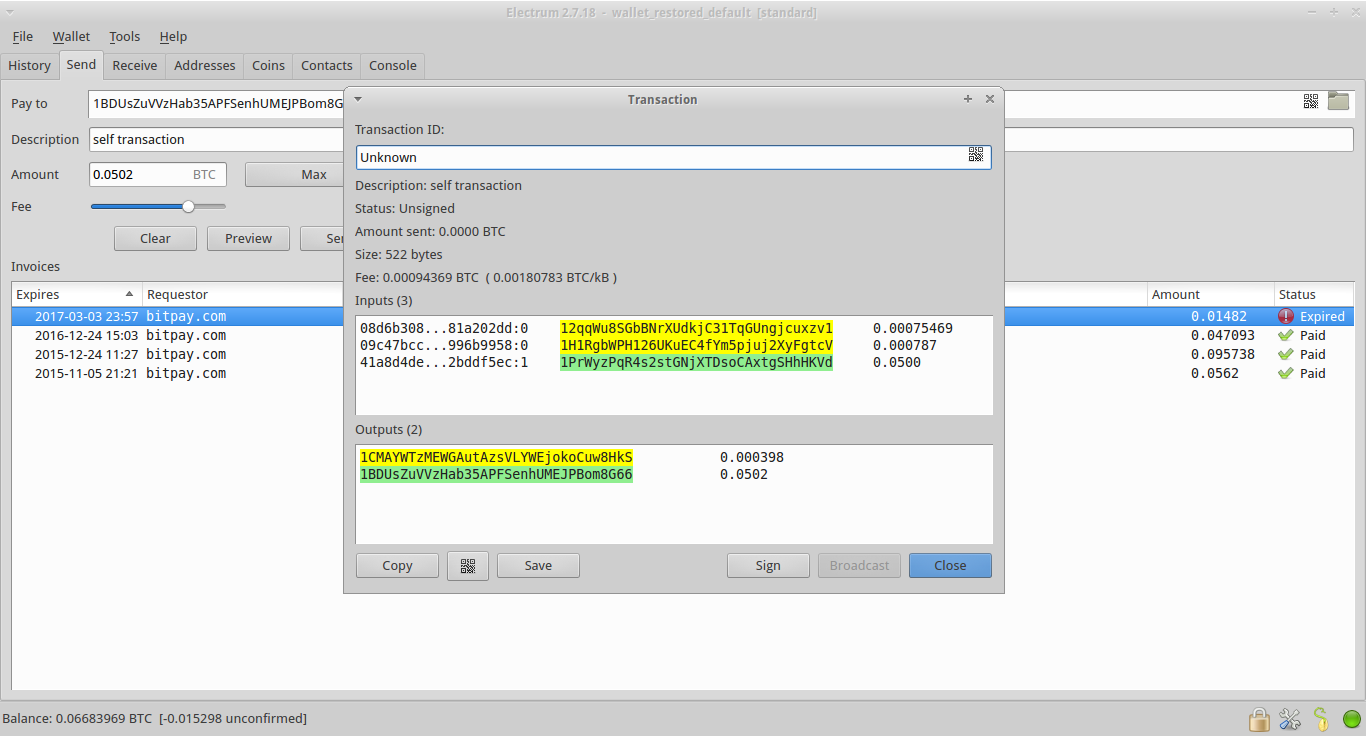
- If your change address doesn’t hold enough coins, there is an alternative: Spend the whole amount in your wallet to yourself. This will make sure that your unconfirmed outputs must be included in the transaction. In my case, I send 0.0502 BTC. Consequently, Electrum has to include all my addresses as an input. Observe, that the hash for the unconfirmed output we looked up before
12qqWu8SGbBNrXUdkjC31TqGUngjcuxzv1is included as well. Now, continue with the steps from above.
- After broadcasting this “child” transaction, Electrum marks it in the “History” tab as long as it is not confirmed. It recognizes that this transaction contains inputs from the “parent” transaction that is not yet confirmed as well.
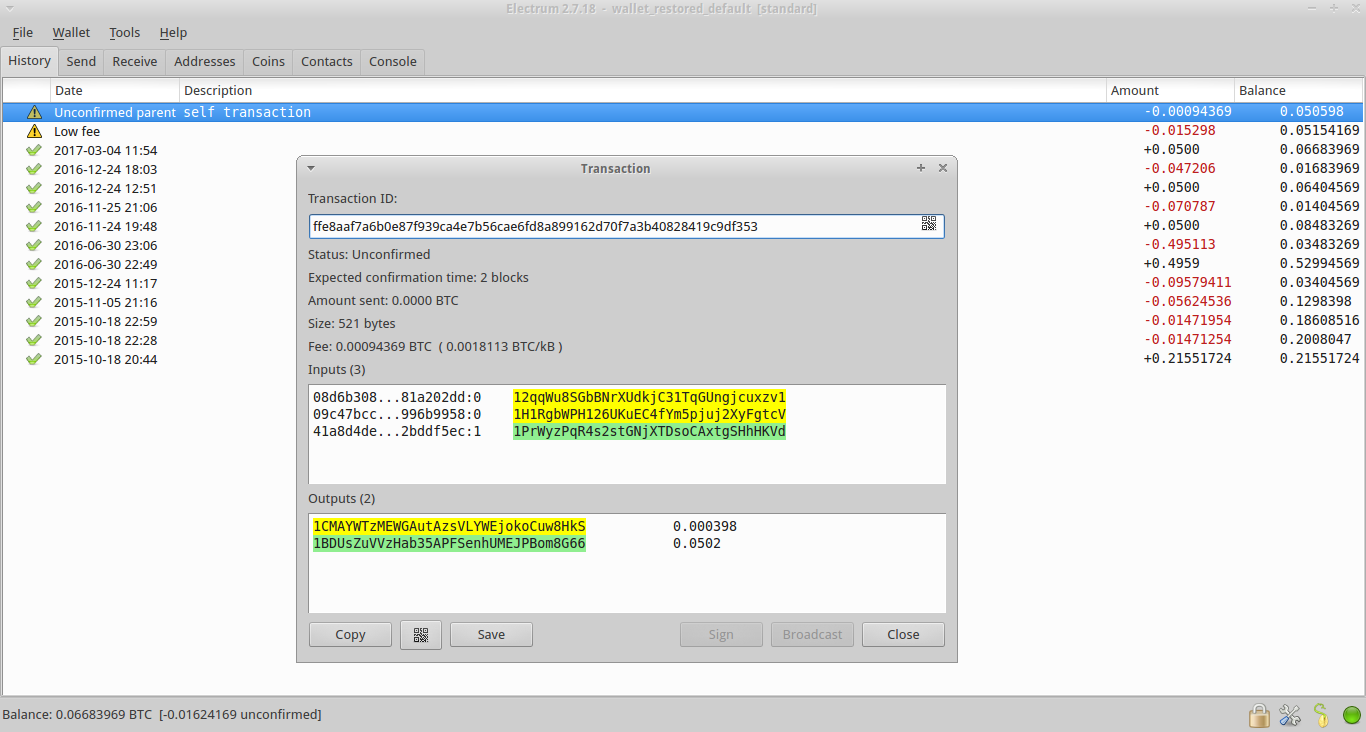
- Finally, when the “child” is confirmed the “parent” will be confirmed as well. Because of the adjusted fee, this should happen quickly.
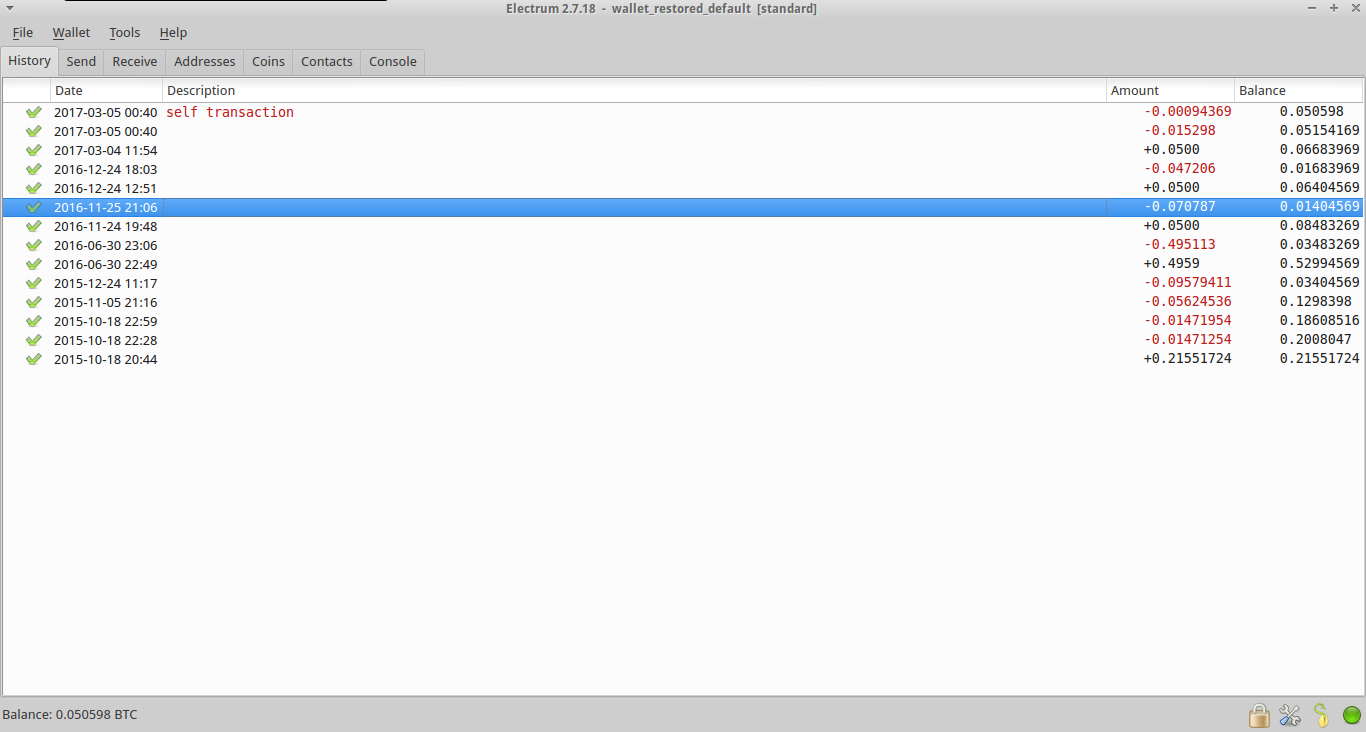
That’s it! Now you know how to resolve unconfirmed transactions with Electrum. As a next step, I recommend to update your wallet software. Most recent versions recommend an appropriate dynamic fee for every transactions. With that, unconfirmed transactions should be a thing of the past.